How I Repaired the OLED Display on My Pure Evoke D4 Radio
The display on my Pure Evoke D4 had been getting dimmer and dimmer over the past months — until one day, it simply went dark.
After some digging online, I realized this is a common failure with this model and its OLED display.
For instance, Alan Winstanley described the same issue with the Pure Evoke 1S in his detailed blog post.
Encouraged by that, I decided to repair mine.
Ordering a Replacement Display
I found what looked like a compatible display on Alibaba: 2024 OEM Pure Evoke 1S Mio OLED Display. After a couple of weeks — and a minor customs adventure — it finally arrived.
Now, time to open up the D4 and see what’s inside.
Making Some Space
Start by removing the six screws on the back panel of the radio. Once they’re out, you can gently pull the back panel away. Inside, you’ll see that the front and back halves are connected by several wires.
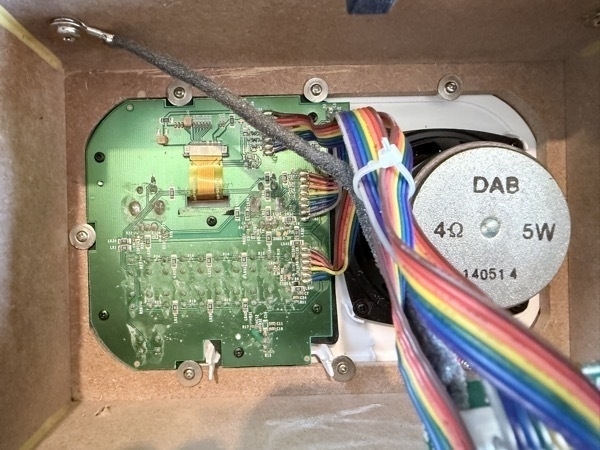
There’s one wire going to the handle, three flat ribbon cables connecting the boards and one wire from the speaker
To make things easier, we’ll disconnect all of them.
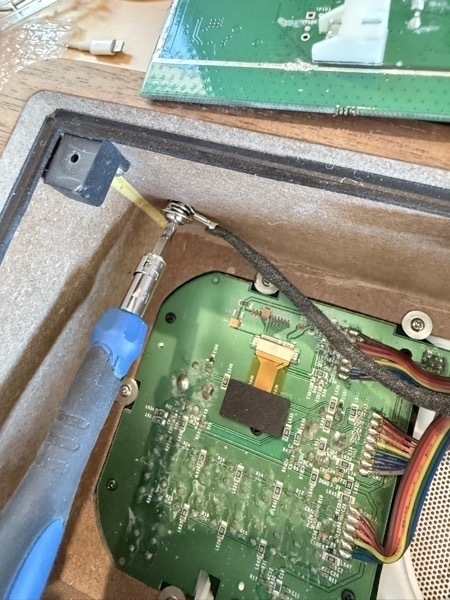
On the back side, gently pull out the white ribbon connectors — no need to use force.
They’re labeled CN1, CN3, and CN4, and the markings are present on both sides, so you’ll easily know where to reconnect them later.
Unplug the speaker wire.
Last, unscrew the handle from the body of the radio.
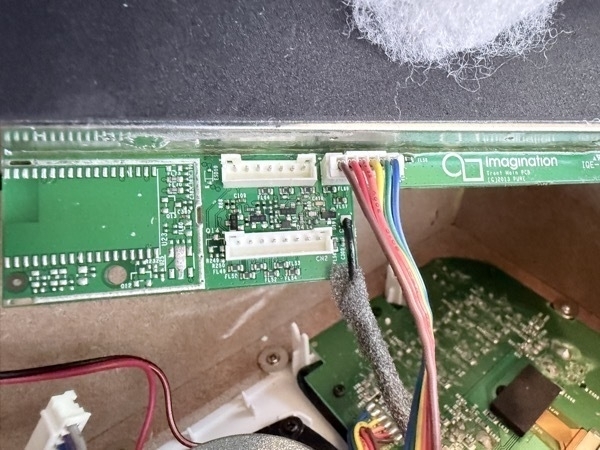
Next, remove the speaker (four screws).
Now you can unscrew the seven screws around the front panel to separate the front from the enclosure.
Replacing the Display
Here’s the interesting part: the display connector sits under a PCB in the center. To access it, remove the six small black screws holding the board in place.
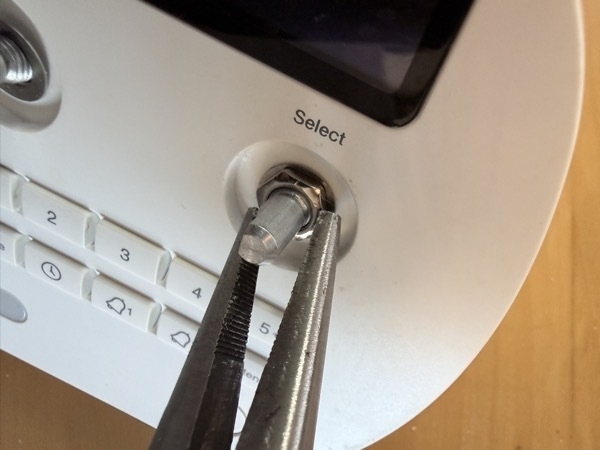
You’ll also need to remove the volume and select knobs. Gently pull them off, and underneath you’ll find a small nut on each shaft. Use pliers to loosen them slightly, then unscrew them by hand.
The OLED display connects via a flat ribbon cable. To release it, use a small screwdriver to gently pull out the two black locking tabs on each side of the connector.
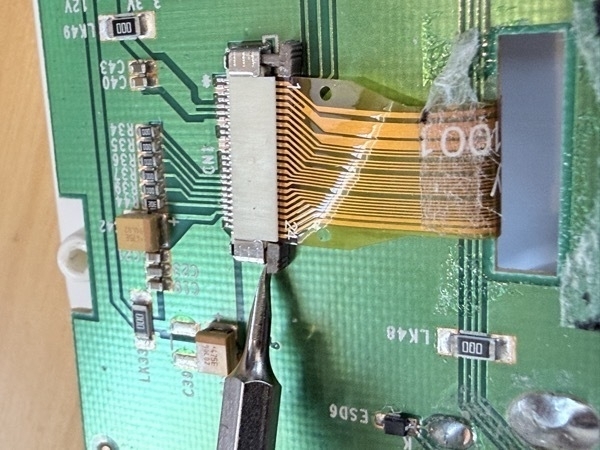
Now the cable should slide out easily. Once it’s off, you can carefully lift out the PCB.
With the PCB out, you’ll have full access to the display itself. Remove the two screws securing it in place.
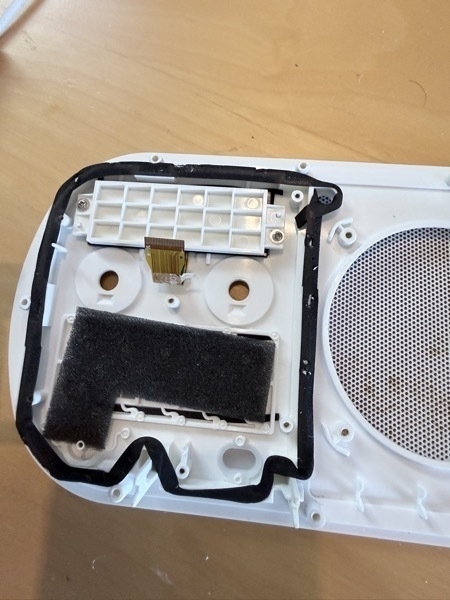
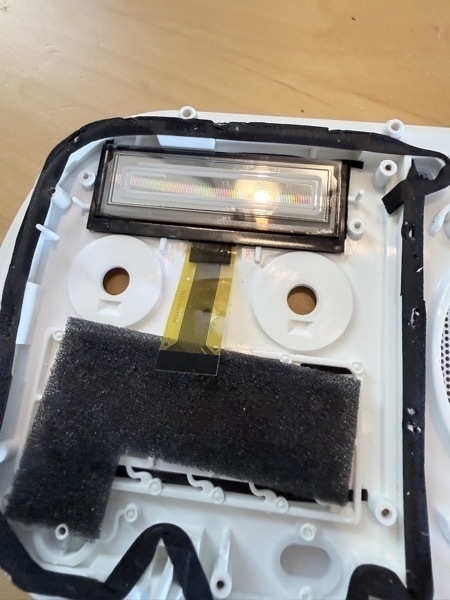
Swap in the new display and align it carefully.
Reassembly
If you’ve been careful, you just follow the previous steps in reverse.
Now slide the display ribbon back into the connector (make sure the locking tabs are open). Once it’s seated properly, push the tabs back in to lock the cable.
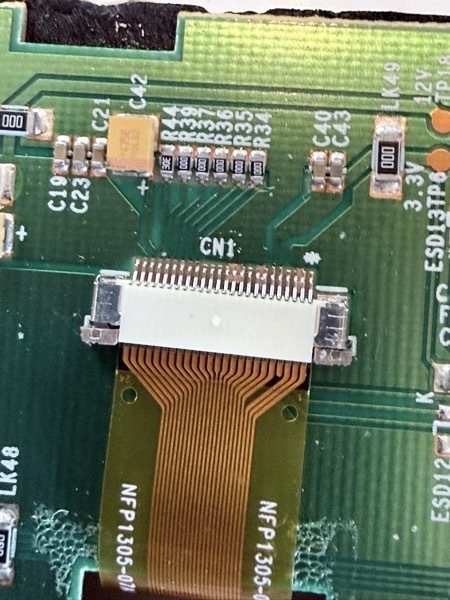
Reinstall the PCB, the front panel, and all the screws. Reconnect the white connectors (CN1, CN3, CN4) and speaker wire. Reattach the handle, screw the speaker back in (remember, the magnet will grab your screws! A plier could be helpful to hold them), and finally reassemble the back panel.
Moment of truth
Power it up.
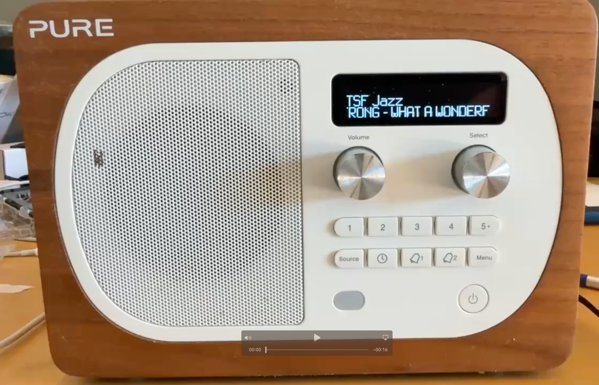
Success! The display lights up again.
However, I noticed that this particular OLED isn’t a perfect fit. It works, but it’s slightly offset.
When I looked at the original display, I saw its exact reference printed on the ribbon:
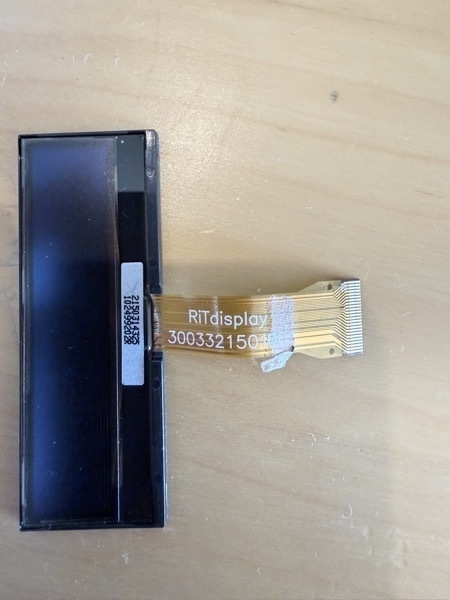
It’s marked RITdisplay 3003321506.
If you search for that reference on Alibaba, you’ll find listings for the exact model used in the D4 — which might be a better match than the one I ordered.
Final Thoughts
Replacing the OLED display on a Pure Evoke D4 isn’t difficult, but it’s not quite the same as the Evoke 1S guides you’ll find online.
If your display is fading, don’t throw away the radio — it’s totally fixable with a bit of patience and the right replacement part.
Now my D4 is back to life, and I can see the time in my kitchen again.